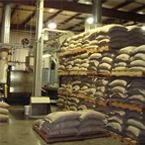
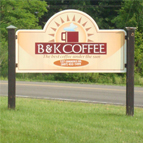
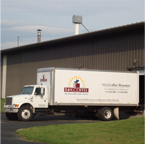
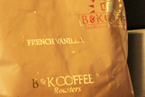
1

Gluten Free, Dairy Free Dinner Rolls

by

I don’t know about you but I am constantly in search of easy yet really good GF bread items.  This had an added bonus of being dairy free.  I was skeptical but decided to give it a try since it was relatively easy. Using simple flours and minimal ingredients.  I changed it up a little but was Inspired by the original recipe I found at glutenfreebread.org .

91DEE0BA-8B46-4DE3-AECF-DBCFC9224374This is definitely a go to recipe.  The only downfall is the rising….they need to rise an hour.  I haven’t actually tried it without the rising so I don’t know if it would work or be as good or not.  If you decide to forgo the rising let me know how they turn out.

These would be super versatile too.  You could do add-ins like – garlic and cheddar (DF if needed), sausage and cheese, breakfast sausage.

I used Bob’s Red Mill Cup for Cup which includes xanthan, if you use a blend that doesn’t have xanthan you’ll need to add extra, I’d add an additional teaspoon.


In the picture the rolls aren’t very brown because I forgot the egg wash.  If you use the egg wash they come out a lot more golden and pretty.


2 cups GF flour
1 teaspoon Not Xanthan Not Guar OR xanthan gum
2 teaspoons yeast
1/4 cup sugar
1 teaspoon salt

1 cup warm water
2 Tablespoons oil (I used light olive)
1 egg
1 teaspoon ACV

1 egg for egg wash, beat til frothy

In a large bowl or bowl of stand mixer combine flour, not xanthan, yeast, sugar and salt. Mix to combine.

Combine the wet ingredients and drizzle over the dry while the mixer is running.  Mix 3 minutes.

The batter will be like thin compared to other bread items. It’s like really thick cake batter or muffin batter.

Decide what pan you’ll use.  I used a mini muffin pan this time as well as the square pan from Pampered Chef, I have also used regular muffin pan, as well as using a cake pan and making pull apart rolls.

Grease pan of choice, use a scoop to put in pans.  I use this scoop for the mini and a large ice cream scoop for the larger pans.  Once in pan brush each roll with egg wash.  You can cover these, as called for in original recipe, but whatever you use will stick to rolls if it touches them.  I left them uncovered and they were fine, though ideally you would cover them.  Let rise 1 hour.

Preheat oven to 400 degrees F.

Bake 12-28  minutes depending on the pan you use.  I did about 12 minutes for the mini and about 25-30 for the pull apart rolls.


0

Gluten Free Chicken Bog

by

Chicken BogI got this recipe here.  I changed it up a bit. But it was a delicious and fairly simple dish.  I think everyone liked it.  My problem has been finding sausages that are gluten free, dairy free and peach free….sigh, food allergies.  Anyway, here’s the recipe.  Some of the comments about the name of the dish was pretty funny.  This is a dish that came from a particular place – South Carolina – as far as I can tell.  I served ours with a salad.  But, any of your favorite veggies would do.  If you give it a try come back and let me know how you liked it.


Looking at the dish it looks like I may have used a rotisserie chicken to make this.  Which would totally make it even easier.  But, I would use that or thighs or breasts.  Don’t limit yourself by the cut of meat.

6 (5 to 7-oz) bone-in chicken thighs, trimmed of excess fat, or breasts or cooked shredded rotisserie
1 tablespoon olive oil
8 ounces smoked kielbasa sausage, cut into 1/2-inch-thick rounds
1 onion, finely chopped
3 cloves garlic, minced
4 cups chicken broth
2 cups long-grain white rice
Morton’s Nature Seasoning
Salt & Pepper

Pat chicken dry with paper towels and season with salt and pepper. Heat oil in Dutch oven over medium heat until just smoking. Cook chicken, skin side down, until well browned, 6 to 8 minutes; transfer chicken to plate. Discard skin.

Pour off all but 1 tablespoon fat from pot and return to medium heat. Add sausage and onion and cook until onion is translucent and sausage begins to brown, 3 to 5 minutes. Add garlic and cook until fragrant, about 30 seconds. Add broth, chicken, 1 teaspoon salt, and 1 teaspoon pepper and bring to boil. Reduce heat to low, cover, and simmer until chicken is tender, about 30 minutes.

Remove chicken from pot and set aside. Stir rice into pot, cover, and continue to cook over low heat until rice is tender, about 20 minutes.

Shred chicken into bite-size pieces; discard bones. Gently fold shredded chicken into rice mixture. Remove from heat and let sit, covered, for 10 minutes. Serve.

0

Gluten Free Pumpkin Roll

by

Pumpkin RollPumpkin Roll

Preheat oven to 350°
6 oz pumpkin puree
2 eggs, beaten
¾ cup sugar
½ teaspoon vanilla
6 Tablespoons oil
½ cup milk

1 ¼ cup GF White Flour
½ teaspoon xanthan gum
1 ½ teaspoon baking powder
¼ teaspoon salt
1 teaspoon ground cinnamon
¼ teaspoon fresh nutmeg

Filling:

1 -8 oz package cream cheese, softened
1 cup powdered sugar, sifted
6 tablespoons butter, softened
1 teaspoon vanilla extract
1/4 cup powdered sugar (optional)

Large tea towel or flour sack type towel, as large as your jelly roll pan.
Powdered sugar

Line a jelly roll pan (a cookie sheet with rims) with parchment, lightly grease parchment.
Lay the towel out and sprinkle with powdered sugar, generously.
Combine dry ingredients in bowl and whisk together.  Set aside.

In a large mixing bowl beat eggs until light yellow and frothy, add sugar and beat again until light and frothy again, maybe 5 minutes.  Add vanilla, oil and milk mix on low until combined and then fold in pumpkin.

Stir in the dry ingredients until completely incorporated into the batter.

Pour into prepared pan.  Bake 10-15 minutes.  DO NOT over bake, as this will make it difficult to roll.  As soon as you take it out of the oven turn the cake out onto the tea towel sprinkled with powdered sugar.  Then roll up the cake starting at the shorter side.  You will actually be rolling the towel into the cake.  Let it cool completely.

While the cake cools you can make the filling.  Combine all the filling ingredients in a medium mixing bowl and mix well until very smooth and creamy.

Once the cake is cool carefully unroll, it.  It may be kind of sticky and messy, but it will be fine once you fill it and re-roll.  Spread the filling onto the unrolled cake don’t go all the way to the edges, though, leave about ½ inch around the edges. After you spread the filling on then you re-roll the cake, I usually cut the ends off so it looks more uniform, but this is optional, put the cake on a plate or platter and sprinkle with the powdered sugar.  Keep in fridge.  I like to let mine sit out for 10-15 minutes before so the filling is creamy instead of firm.  Also, you might want to sprinkle with powdered sugar again if it all soaked in.

1

Protein Power Balls (GF, Nut Free, Paleo, DF)

by

Even thought I’m trying to stick with a primarily Paleo diet, I still want to eat treats and I need/want them to be healthy or at least healthier.  My mom (she’s the best) got me some of these Paleo Power Balls, they were ok, a little dry and pretty expensive, there are only TWO balls in each bag!!!  Wow!!  I said I think I could make them myself and I did.


Orange Cranberry Protein Power Balls


My mom did a recipe detailer and she said that it comes out to about 77 calories per ball.


1 cup coconut butter/coconut manna
3/4 cup unsweetened, shredded coconut
4 Tablespoons Collagen Powder
1 teaspoon Beef Gelatin (it is flavorless)
3 Tablespoons Craisins (this keeps it from being AIP and probably not totally Paleo because of the added sugar)
Good pinch of sea salt

1 Tablespoon coconut oil
2 Tablespoons orange juice

Water or more OJ if needed


I measured the coconut and then I processed in my magic bullet because I wanted it to be fine.  I also processed the craisins, but be careful if you go too far they will start to make a paste, just pulse to desired size, I did mine maybe to rice size or a bit smaller.

Combine in a bowl the processed coconut, craisins, collagen, gelatin, orange zest and salt.  Stir to combine, you might need to kind of knead it a bit with your hand to get it all really combined.  Add in coconut butter, stir/mash around to get incorporated, then stir in the coconut oil and OJ.  Stir and mash around until it is all combined.  The consistency should be similar to cookie dough.

I used this scoop to make the balls and this recipe yielded about 25 power balls.

They will be a little soft but will firm up a bit as they sit.  I like them room temperature but you could put them in the fridge or freezer too, the colder they are the harder/firmer they will be due to the coconut in them.

I made these with bottled OJ and no zest because I didn’t have any oranges on hand and the zest really kicks it up.

If you have a similar or another paleo, nut free protein ball recipe leave a comment and share it!

0

Favorite Find Friday – Cassava Flour

by

Favorite Find Friday2


Welcome to a LONG over-due Favorite Find Friday!  You can see other favorite finds here.

In my quest for baking Paleo and nut-free – I found cassava flour.  Some might say tapioca flour/starch is the same, however that’s not true.  Cassava flour is a whole food, it is a root vegetable, dried and ground into flour.  Tapioca is the starch extracted from cassava root.

I found two brands that I have used personally, both are gluten free.

Moon Rabbit Foods – which is made in a dedicated GF facility, non-GMO

cassava flour


Anthony’s Cassava Flour – Batch tested GF, non-GMOcassava_2lb_amz_front_1024x1024I have used it to make several different baked goods.  I made scones, cookies, biscuits.  It is texturally much different than other GF flours, however you need no xanthan gum.  I used it in with coconut flour as well as adding in tapioca or arrowroot.  I will try to get some other recipes up, but I’m still struggling with my health so I’m not sure when I’ll do it.  I do have the Cassava Flour tortillas and they are great for wraps, tacos, enchilada casserole.

This flour is AIP compliant, Paleo, Whole 30, Gluten Free, Nut Free

If you have a favorite Cassava flour recipe leave a comment and share it !!

0

Weekly Menu Plan – week of March 13, 2017

by

Gluten Free Always Weekly Menu Plan

Pressing on with the new way of eating.  Trying to find things that everyone will eat.

I did rally myself to make paleonola and homemade yogurt.  I’m going to stick with primarily paleo with dairy (aged, fermented or cultured).  As well as continuing to juice.


Plan for the week:

Monday: Hot Dogs (All beef, no nitrates/nitrites), chips and fruit

Tuesday: Chicago Chicken and sides.

Wednesday: Tacos (I will used cassava flour tortillas, if I’m up to making them, if not I’ll have taco salad

Thursday: BLT Chicken (found on Pinterest, if it turns out I’ll share)

Friday: Cheeseburger Casserole

Saturday:  Salmon Patties (a new recipe that’s paleo) Roasted Veggies

Sunday: Leftovers

1

Ch – ch – ch- changes…. and a recipe Cassava Flour Tortillas

by

cropped-Blog-header2-page0001-1-1.jpgI guess that tag line will only reach a certain number of people…haha….it’s from a song.  Not that this post has anything to do with the song itself, only in the fact that I’ve had a lot of changes.  I have been absentee this year for the most part because I’ve been sick.  I won’t go into all the details, but this has led to some dietary changes and I’m still trying to find my way.  I have some great new recipes to share once I’m able to pull it all together. Trying to navigate my new food regime has been a challenge while I’m feeling so bad already.  I’m working on being Paleo/SCD/AIP, I’m thinking it’s a process, I’m having a hard time making the switch.  I feel like I did when I went GF 7+ years ago, that does bring it’s own set of reassurances in that I made it to where I am now so I know I will make it through this too, it will just be a hard and trying time.  That being said here is the first of many great recipes to follow, I also made scones with this.


First a little about cassava versus tapioca.  Some people will say that they are the same.  The difference is that Cassava flour is the actual root that has be ground into flour as opposed to the tapioca which is just using the starch from the root.  You can read more about it here, if you’re interested.  So, this would be compliant with Whole 30 as well as Paleo since it is a “whole” food.


Here's my sandwich wrap with the finished tortilla.
Here’s my sandwich wrap with the cassava tortilla.

Cassava Flour Tortillas

This made 6 approximately 6 inch tortillas

3/4 cup cassava flour
1/4 teaspoon salt
2 Tablespoons oil (I used Extra Virgin Olive Oil)
1/3 + cup warm water

Heat cast iron skillet or griddle. I used a bit of coconut oil to rub pan on the first one but gave it up as I went along.

Combine cassava flour and salt, stir in oil and 1/3 cup water, stir to combine.  You want it to come together in a dough that is moist but not too wet.  You should be able to pick it up without it sticking to your hands too much.  Add water if need to get desired consistency.

Divide into six balls.  I used my tortilla press to flatten.  I cut two pieces of wax/parchment paper, one for top and one for bottom of press.  After pressing I picked up the piece with the tortilla on it and put it in the hot skillet, it was easy to peel off the wax paper when it was in the pan and made it not tear like it did when I tried to take it off before placing it in the pan.

Cook about 3 minutes per side.  I under-cooked a few of them so they were more chewy and less supple.  I think you could totally press them thinner and cook longer to make chips, though I haven’t tried this.

That’s it!  Isn’t that amazing? Super simple less than five ingredients and maybe 15-20 minutes start to finish.  This tasted as close to a gluten tortilla as I’ve tasted.  I used it for tacos and sandwich wraps so far.

0

Gluten Free Hot Ham and Cheese Rolls

by

First I’d like to say these were way better than I thought they’d be and I thought they would be pretty good.  Also, I was totally surprised at how good they were re-heated…..sometimes/often that is just not true with GF food, especially bread type items.  But these were just as good if not better re-heated.  I saw this on Pinterest, of course, and knew I had to make it GF.  The other thing I love about it is you can switch up the meat and cheese to so many different options.  I didn’t actually make it with ham, I used turkey.  But, I didn’t think hot turkey and cheese sounds as good as hot ham….  So on to the recipe…


img_1879

1 recipe of your favorite pizza dough – this is mine or in a pinch this one.

3/4 pound deli meat, sliced thin but not shaved (I used turkey)
12 slices of cheese (I used cheddar)

Glaze:

1/2 cup butter
2 Tablespoons brown sugar
1 Tablespoon Worcestershire (USA Lea & Perrins is GF, other may be too)
1 Tablespoon Dijon mustard
1 Tablespoon poppy seeds

Heat oven to 375° F
Grease a 9X13 baking dish

Make glaze and set aside.

Roll crust to approximately 13X18 inch rectangle on an oiled sheet of parchment. Oiling is important so your dough doesn’t stick as you roll this up

Top with meat and then the cheese, filling the rectangle, you can overlap if needed.  I should’ve taken a picture of this.  Here’s an image from internet.  I didn’t put mine that close to the edge I left a little room

Photo credit: jumblejoy.com


Starting on the longer side, begin rolling up tightly.  I used the parchment to do this.  I rolled and then used the parchment to make it as tight as possible. I would roll and then slide my hand across the parchment to set it against itself and then pull the parchment up and roll again, repeating this until the end.  (I hope this makes sense)

Cut into slices 3/4 – 1 inch wide.  Place in prepared pan.

Pour glaze evenly over the rolls.

You can cover and refrigerate up to 24 hours OR bake immediately. I did not try the make ahead, if you do, let me know how that turns out.

I baked immediately for 25-25 minutes, until golden brown.

I think if I refrigerated this I would let it come to room temperature before baking, if not you might need a longer baking time.


Enjoy!!   If you give it a try come back and let me know how it turned out.


Note:  if you use the pizza dough recipe that I shared, this is DF, EF and GF.  So if you used DF cheese this would be DF as well.

1 2 40